| The following action took place on surfaces adjoining the
Sorensen bunker complex 17 kilometers north of the Ratu Boku Line. The attack
on Bunker 447 attempted to consolidate attacks made in previous days by
securing key hard points. The Australian defenders were able to hold their
position although the facility was badly damaged and abandoned after
demolition. The following game report covers microwarfare elements of the
battle at a point where Selangor MGVs approached a blast fracture in the
bunker's west foundation face. The area was heavily infested with the metal
fungus common to the front lines. The battlefield is flat, with many metal
fungus towers and much rocky debris and red oily blast residue scattered
around. There are also several large chunks of rock and other obstacles. |
| |
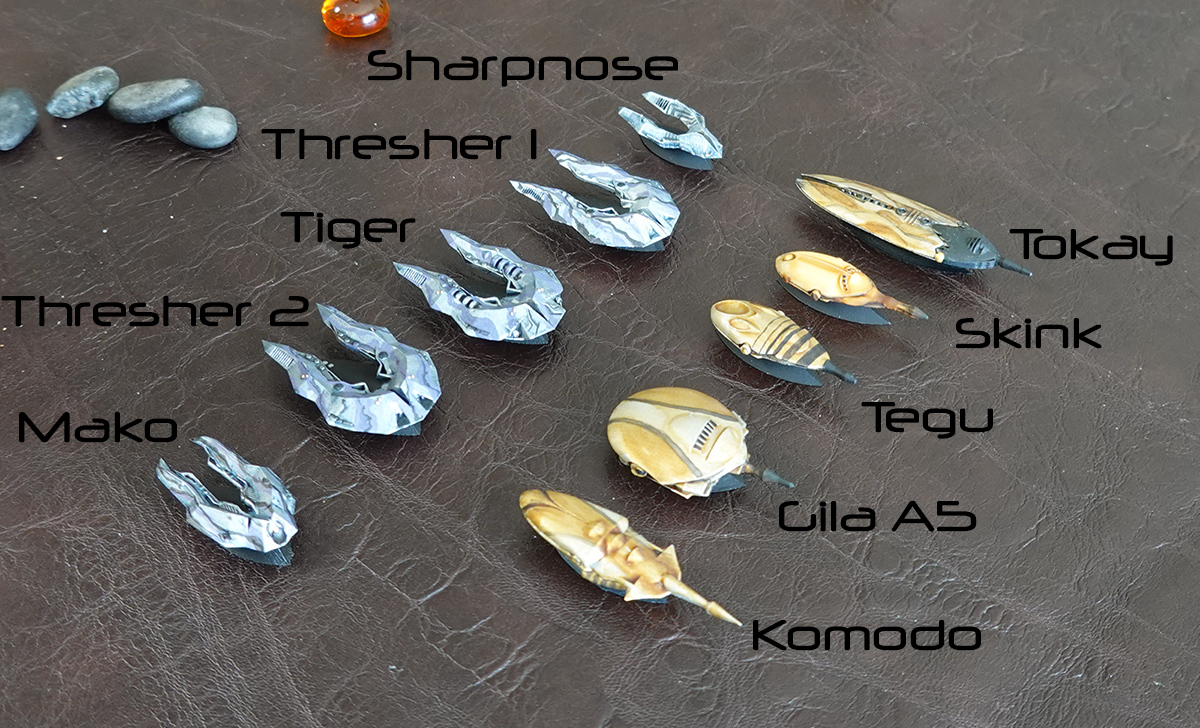
Above: The attacker/defender lineup,
Selangor vs Australians |
| |
The Selangor side was five MGVs totalling 121 purchase
points. The Australian side was also five MGVs totalling 125 points.
The Selangor player chose a heavy missile assault compliment by
assigning both Thresher MGVs with missile main armament, giving them defense
modules to help them stand up under the inevitable attention they would
attract. To help defend and support them, the Tiger and Mako were given kinetic
and thermal weapons, with the Mako carrying a payload of long range beacons
intended to help the threshers target specific enemy MGVs.
The
Australians went for a more mixed combined arms approach by using the Komodo
for kinetic attack, the Gila A5 as a missile platform and the Tokay payload
platform as a very powerful MGV jammer. They used the Tegu unit as a high speed
scout, loading it with a robust power supply and a partial load of long range
beacons. This proved to be a mistake, because once the Tegu's beacons were used
up (which happened quickly because it suffered a payload hit), it became
effectively useless for the rest of the battle. Advice: Unless fighting with
larger numbers of MGVs, dedicated scouts are not a good use of resources. The
Skink was given a good general purpose photon main weapon.
For
positioning, the Selangor occupied the center in strength by placing the
two-ship thresher battery behind heavy blocking cover (a large, tall rock in
the center of their lines). The Tiger and Mako took up position on the right to
quickly sweep forward through an open line of approach into the Australian
lines. The Sharpnose took up position on the far left. The Australians dropped
their right and positioned everything in the center and left flanks. The Tokay
took position behind some rocks with a commanding view of both major approaches
to the lines. The Komodo - a very formidable unit with great armor and weapons
- took position forward of the Gila, which stood back from the lines but
remained in the open (another mistake... missile units are best taking open
topped cover). The two light units took position forward of the Tokay, ready to
advance to meet the Selangor. The Tegu's goal was to move at high speed into
enemy lines and launch spotter beacons to find the bulk of any enemy units
hiding in heavy cover. |
| |
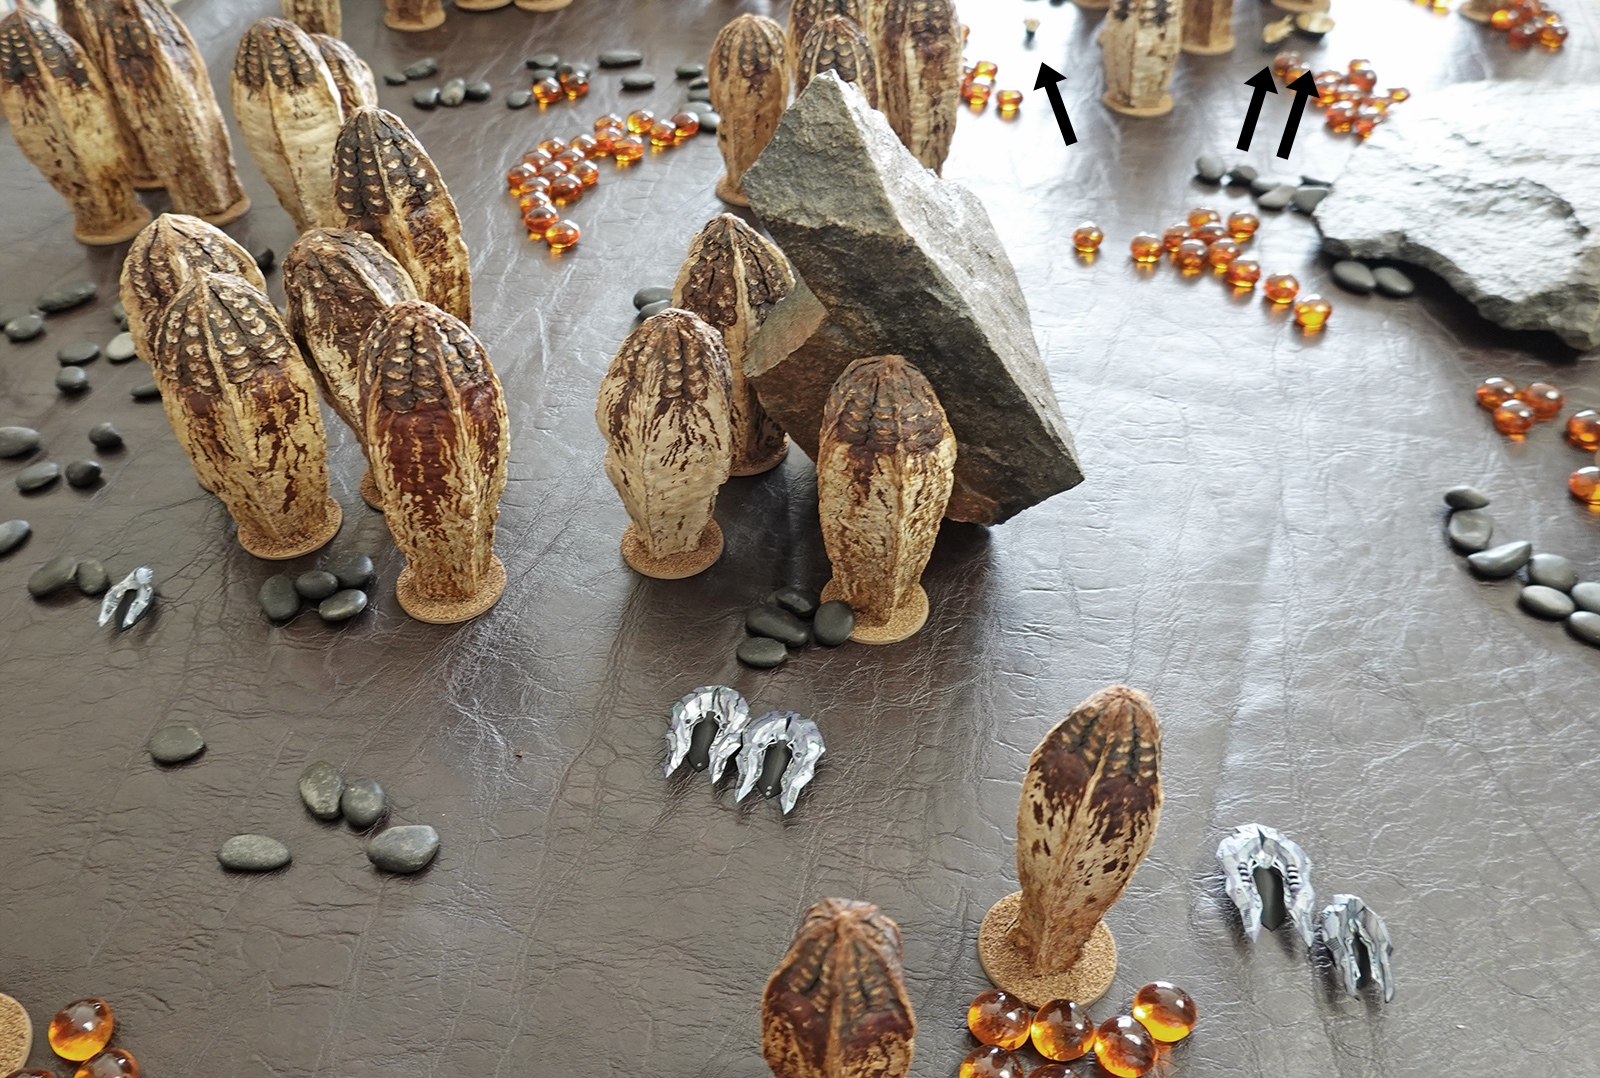
Above: Start of first turn. The Selangor are in
foreground (Tiger and Mako at right) and the Australians are in the distance
(marked by arrows). |
| |
| For the first "W" phase, the Australians won the
initiative roll and used it to move forward. The Komodo advanced into a rocky
position overlooking the probable line of Selangor advance, and the Tegu made a
high speed run across the field in an attempt to position itself for a long
range beacon launch. It failed. Instead of taking advantage of a large gap
between two lines of fungus towers to move directly into an approach alley into
the Selangor lines, it instead went around (mistakenly thinking the towers were
a solid obstacle). This extra use of movement cause it to fall short of its
objective, and it ended up halting next to a small ridge of rocks with its left
field of fire masked. |
| |
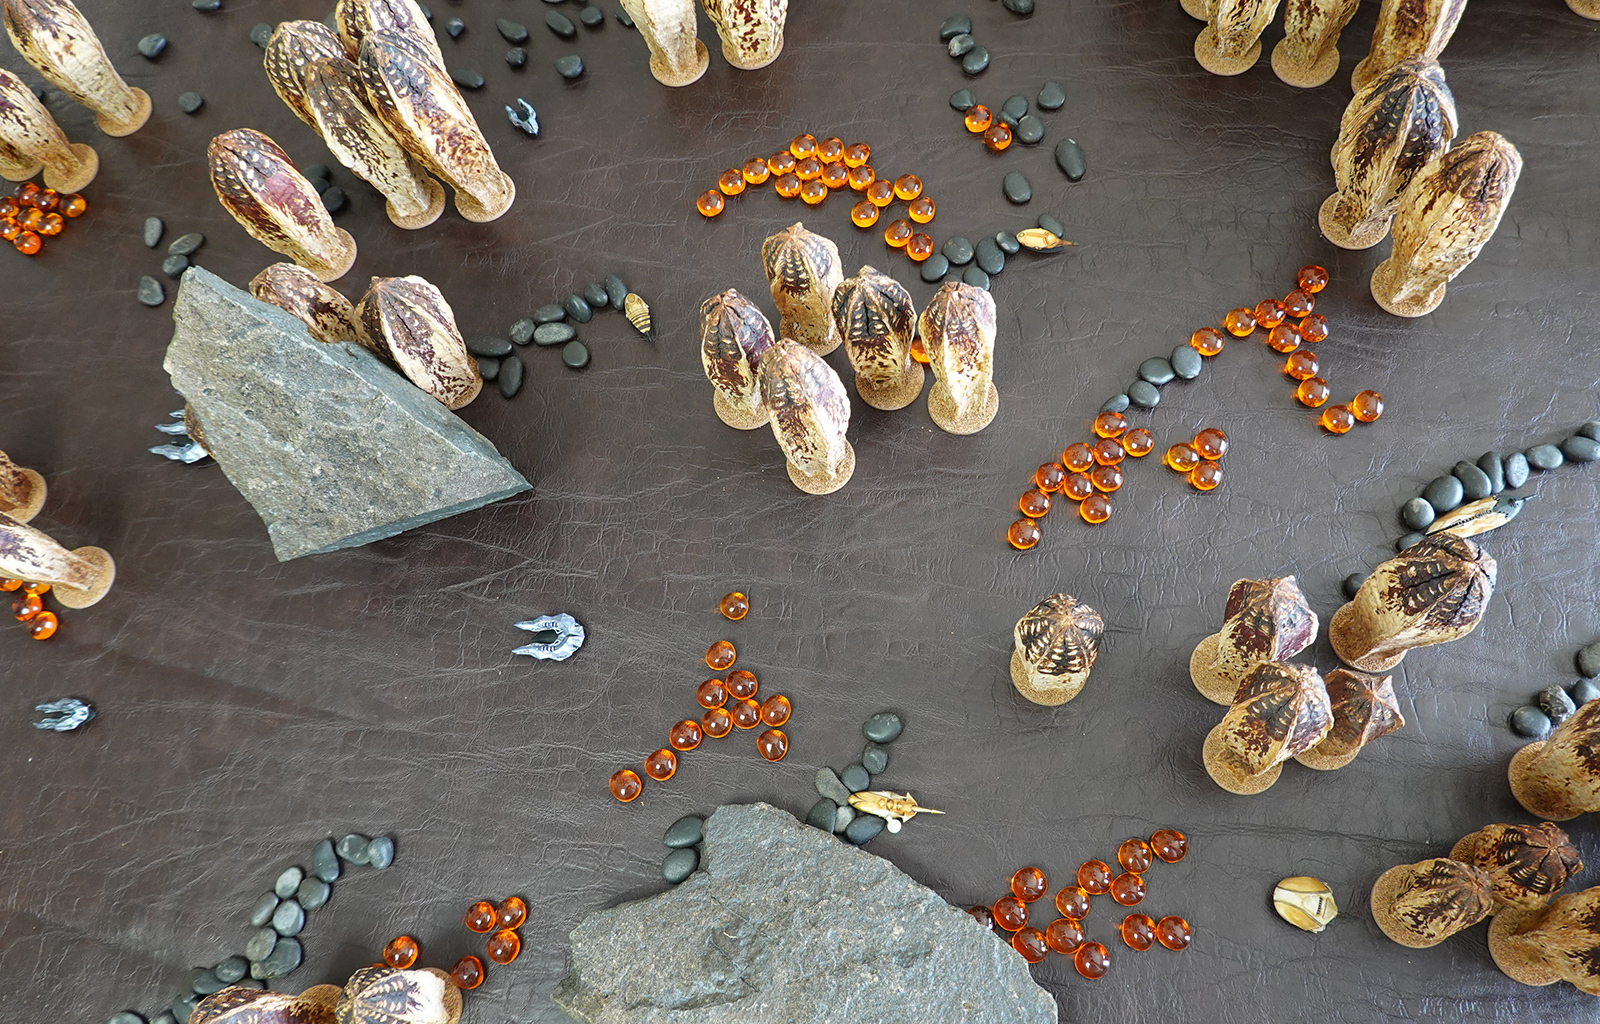
Above: First turn moves. Australian lines are at
right, Selangor lines are at left. |
| |
For the second "X" phase, the Selangor won the
initiative roll. Since plenty of enemies were in sight, they opened fire with
everything they had. Since the Komodo was pushing forward while the other
Australian units hung back, it was (correctly) presumed to be a kinetic combat
unit and therefore a danger to the thresher battery should it choose to charge.
All weapons fired on Komodo, starting with a marker beacon that went streaking
out from the Mako onto the Komodo's position. The Tiger and Mako both both
missed with their firing, but after a pair of exciting die roll rounds the
threshers scored five hull hits, giving Komodo the beginnings of a thorough
infestation of nano-attackers which were to spread further in following
turns.
For the third "Y" phase, the Australians won the initiative roll.
With the Mako being an annoying source of marker beacons and offering a chance
to take down a fast, moderately capable weapon platform, all fire was guided
onto it. The Komodo - who had a sure shot - rolled SNAKE EYES for its 2D6 roll!
Still, that was one damage which managed to put a payload hit on the MGV, so
suddenly the Mako went from having a loadout of six beacons down to two in just
one phase. The Gila A5 also fired on Mako and scored two core
nano-infestations. So far all enemies were out of range of the Tokay's
jammer. |
| |
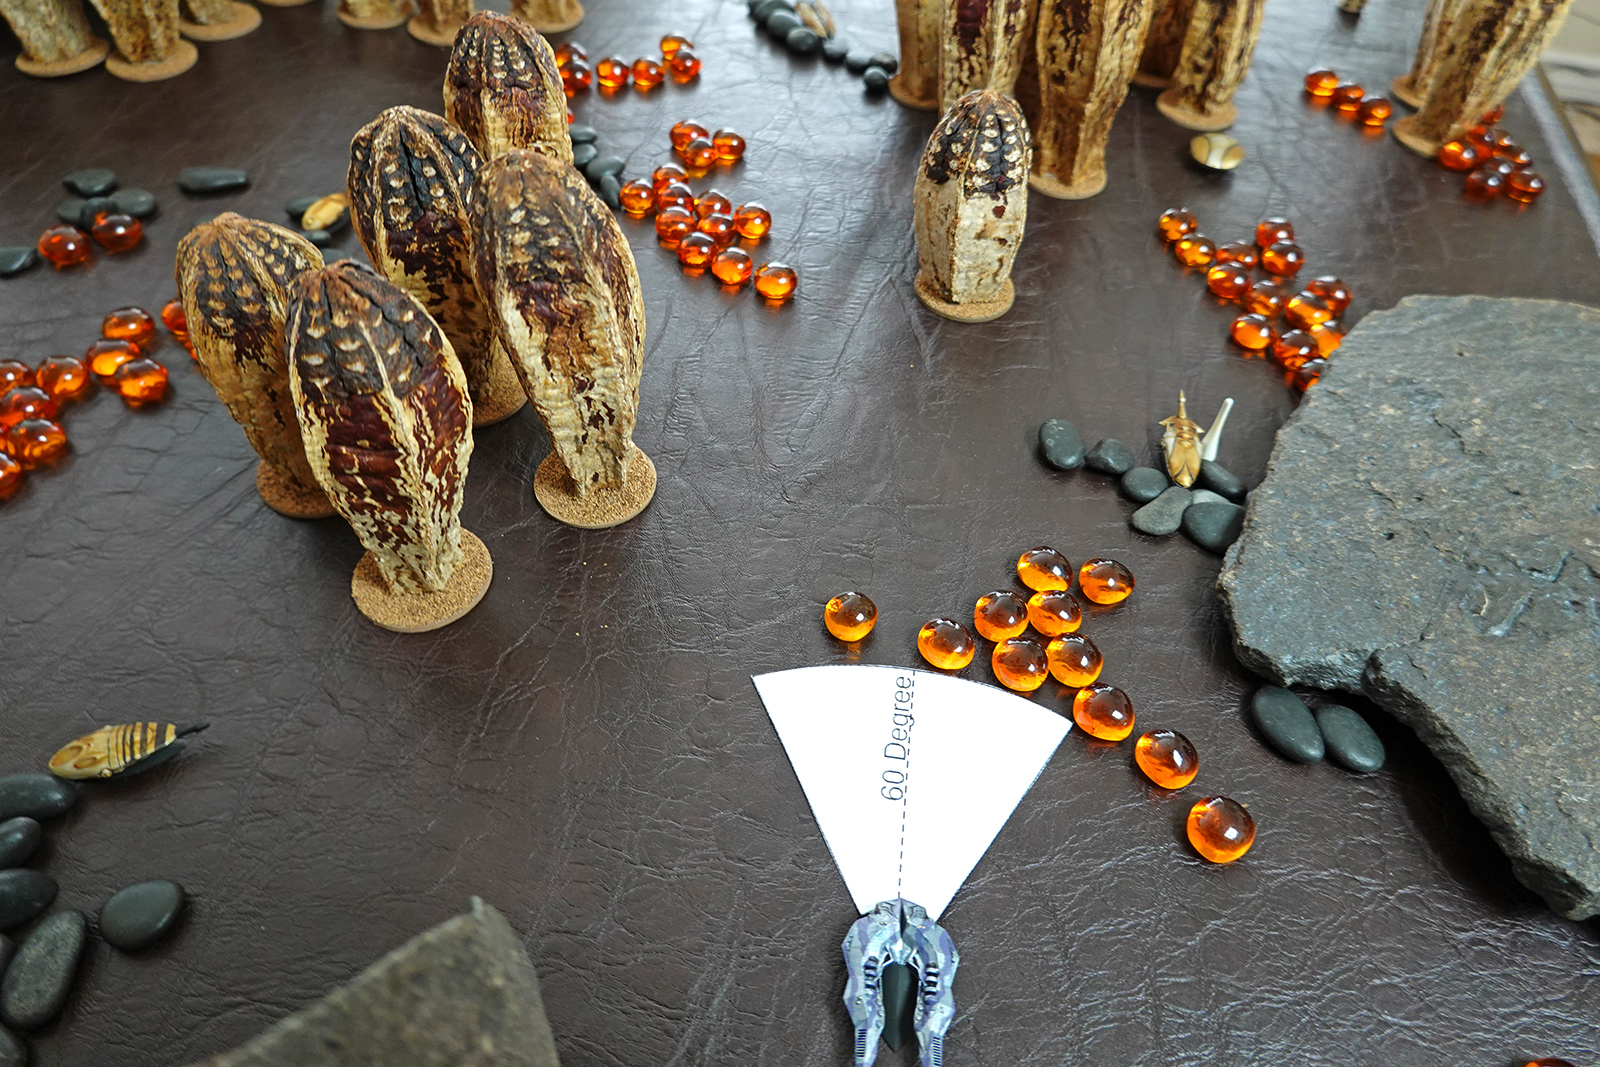
Above: The Australian Komodo is in the rocks are
right, with its position marked by a beacon. The Selangor Tiger is in the
center, using an arc-of-fire card to check target options. Tegu is at left,
languishing next to a rock! |
| |
The final "Z" phase dictated a Selangor move,
because all other move/attack combinations were used. The Tiger and Sharpnose
both moved forward, Tiger's goal being to close with and do damage to the
Australian heavy units loitering in the rear. The Selangor player had correctly
divined that the Tokay was a powerful jammer unit and wanted to get as close to
it as possible before it turned on.
The Reset phase went quickly;
Komodo failed to clear any of its nano-infestations, the Mako scrubbed both of
its core infestations out, leaving it in decent shape except for its now badly
depleted beacon stock (beacons good).
For the second turn, the first "W"
phase initiative was conveniently won by the Selangor player, who now
benefitted from a firing phase happening immediately after a move phase. The
Tiger, now relatively close to the Komodo, chose to fire on it, scoring speed
(S) and defense (D) hits. The Mako failed to score any potentially damaging
Thermal hits on Komodo. Now that the Selangor player had become thoroughly
suspicious of the Australian Tokay setting up in the rocks, Mako fired off a
marker beacon onto the Tokay position and the two Selangor Threshers opened
fire onto it. For the die competition, they went for the brute force method of
rolling all core attack dice. The Australian player - playing it safe - chose
point defense of its core and put all defense dice there. End result: A
spectacular double fail to score even a single infestation hit on the Tokay;
bad tactics and bad dice equaled failure. |
Above: The Australians move out; Komodo with its
multiple on-board infestations and damage decides that nobody lives forever and
those Threshers seem like they're just around the next corner. It moves up
along with the Tegu (background left) which tardily completes its spotting
mission. |
| |
The "X" phase initiative was won by the
Australians, who desperately needed to complete their deployment and in any
case, the Selangor had already fired for this turn. Komodo moved out of its
rocky hiding place and moved forward in an attempt to get at the mass missile
battery in the Selangor center. The Tegu now moved forward to do in person what
it should have done via spotter beacon last turn; namely to spot those
threshers for the Gila missile unit. The Australian Skink moved up to help
block the light Selangor Sharpnose unit moving around from its position on the
far Selangor left.
The "Y" roll was won by the Australians, who happily
opened fire with their newly positioned units. Tokay finally switched on its
jammer module and instantly paralyzed the Tiger. It also used its small photon
main weapon to plink at the tiger and miss. The Tegu fired twin marker beacons
onto the Selangor threshers (admittedly way better than mere spotter beacons)
and the Komodo could now see the threshers and opened fire on the nearest one
(Thresher 2), scoring triple Se, D and Py hits (sensor, defense and payload).
At the same time missile fire from the Gila A5 across the battlefield arrived
and also hit Thresher 2, scoring five hull infestations in a skilled mixed-load
nano-assault (used both hull and core attack dice in the competition
roll). |
| |
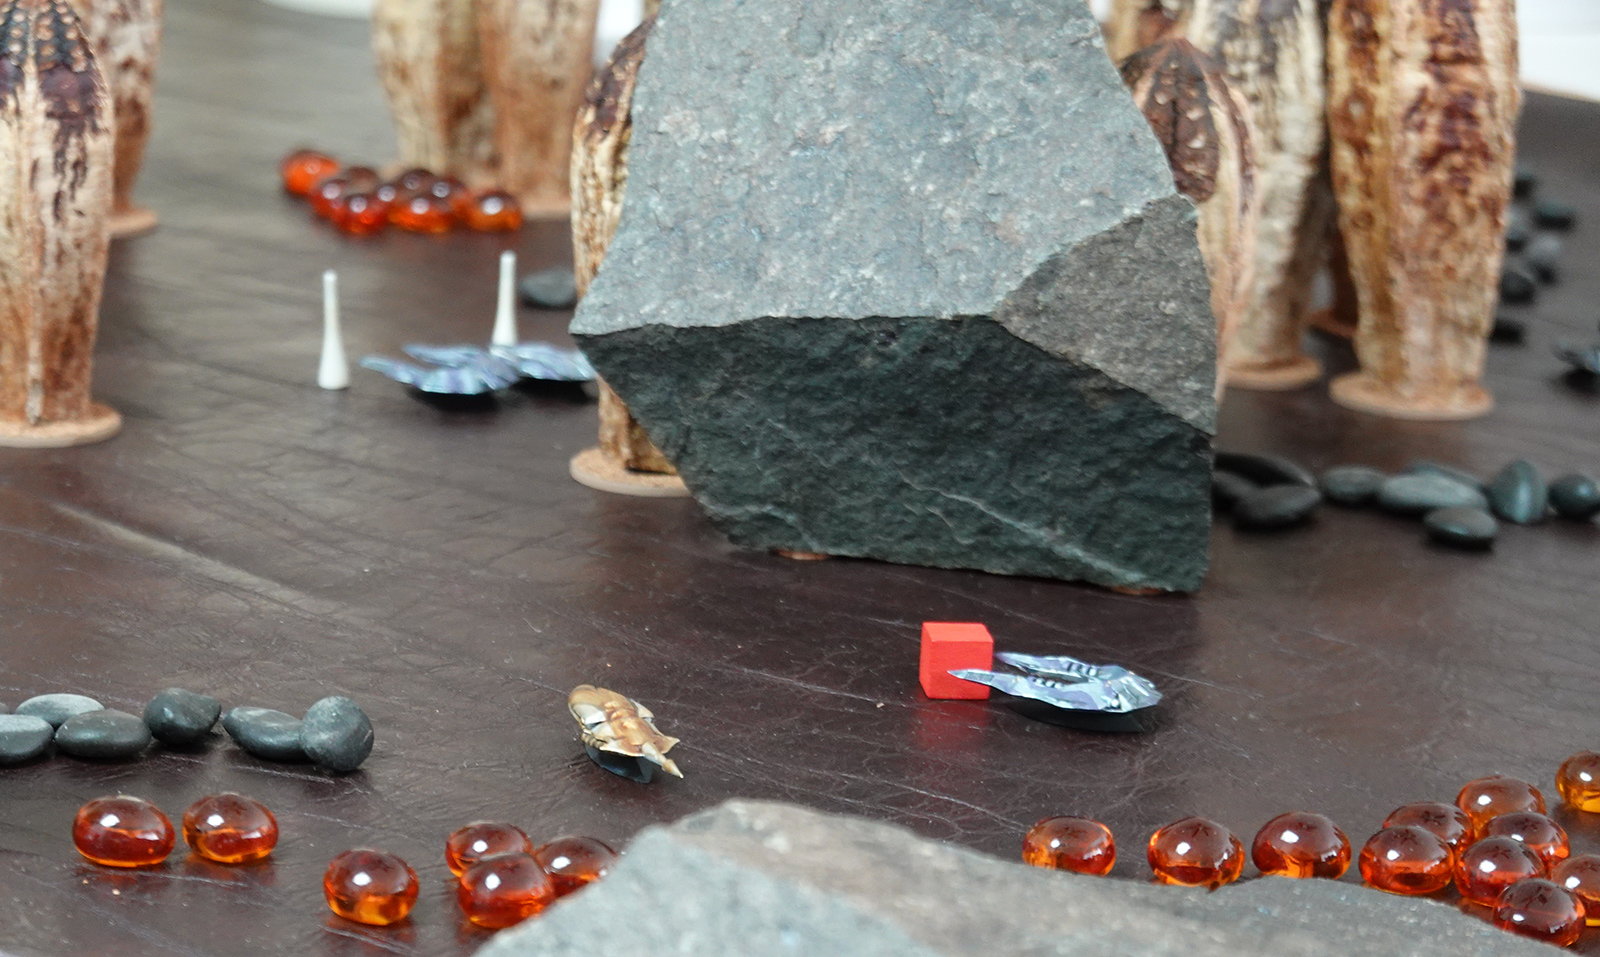
Above: A view after the Turn 2 Australian fire phase.
The Selangor Tiger is now paralyzed under the effects of the Tokay's jammer
module (red cube) and the Australian Komodo is flanking the Thresher position,
with the threshers visible in the background, both of them with white marker
beacons placed on their respective positions. |
| |
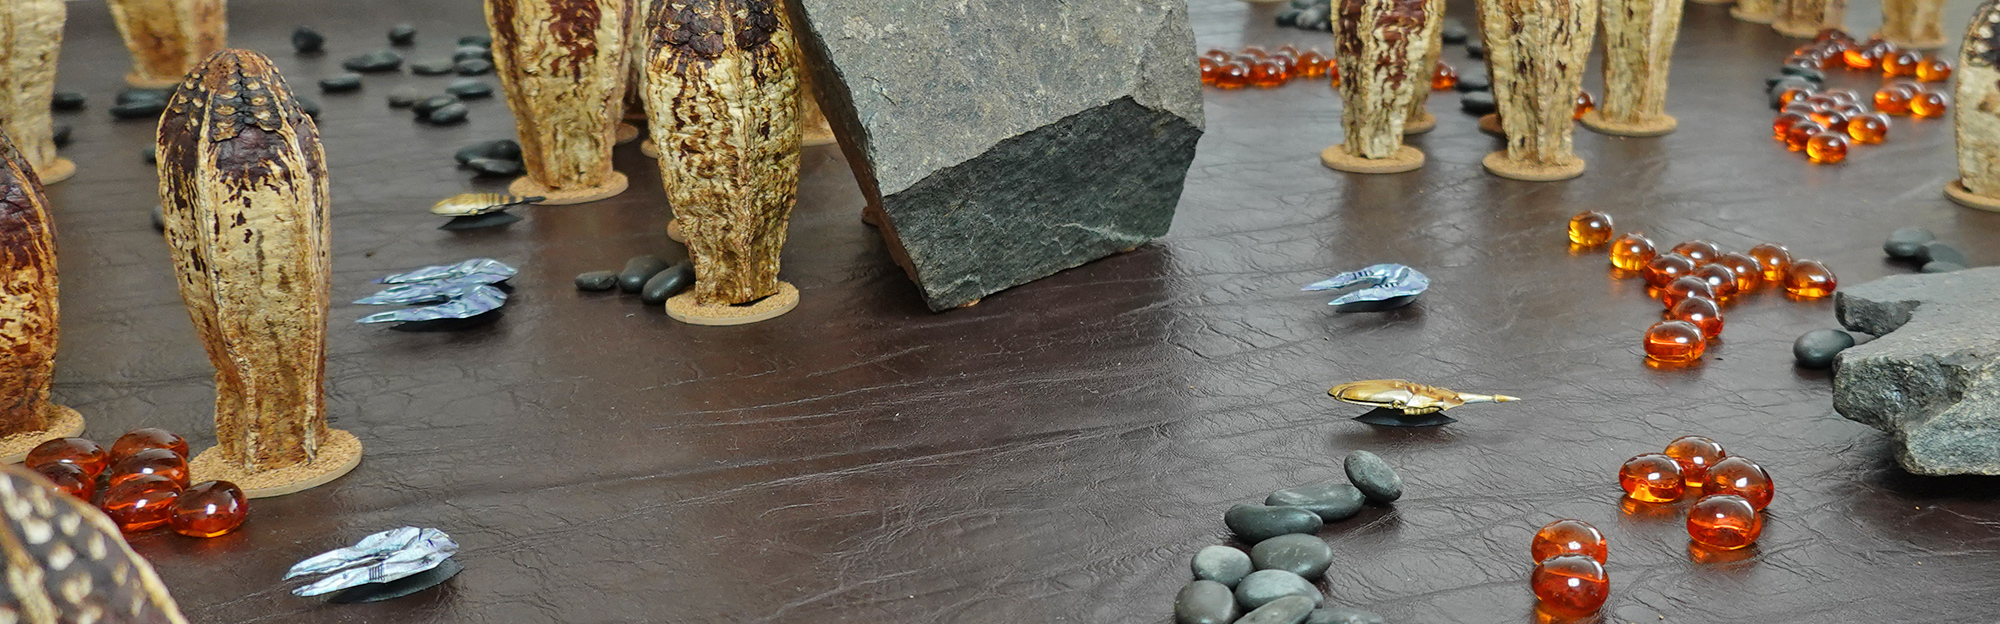
The final phase was a Selangor move. The Mako
stayed where it was, sort of trapped in one corner of the battlefield by the
advancing Komodo. The two threshers predictably flushed from their position
with a sharp move to the left, moving past the Tegu and getting as far from the
Komodo and into cover as possible.
There were still no brain hits, so no
sudden deaths. Recurring damage took place in two MGV who suffered some
spreading of enemy nano-infestations (always a concern). No major repairs were
attempted. |
| |
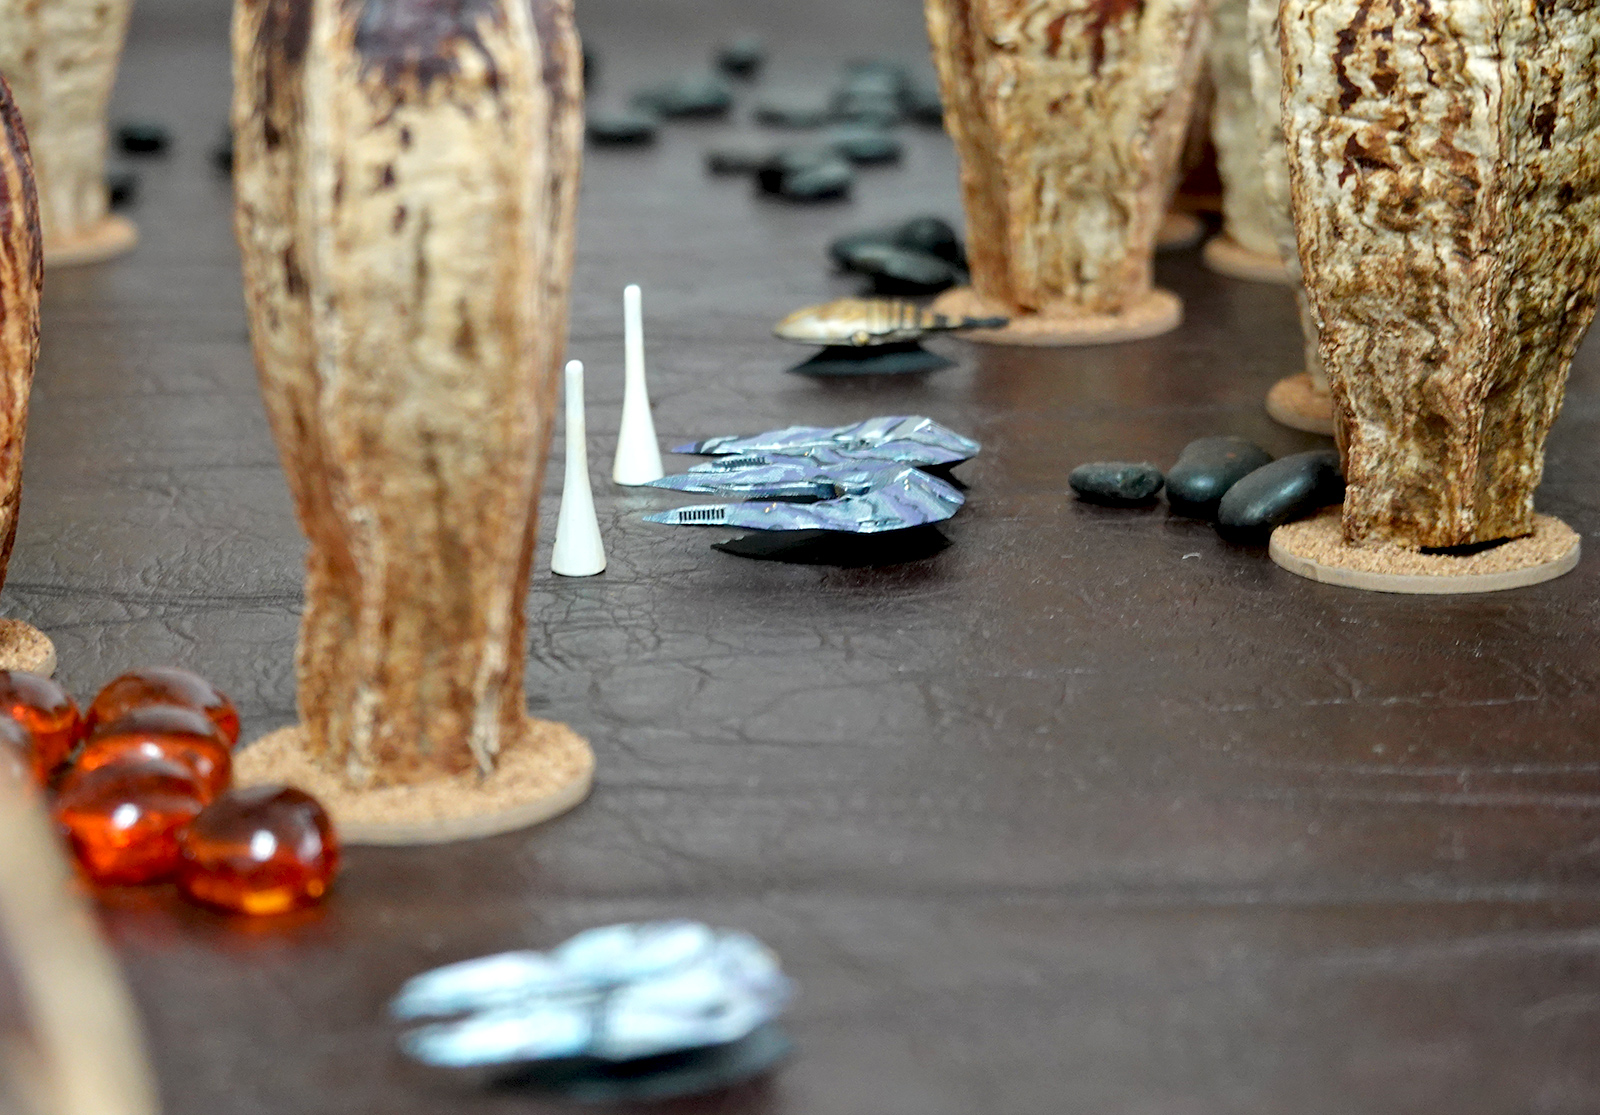
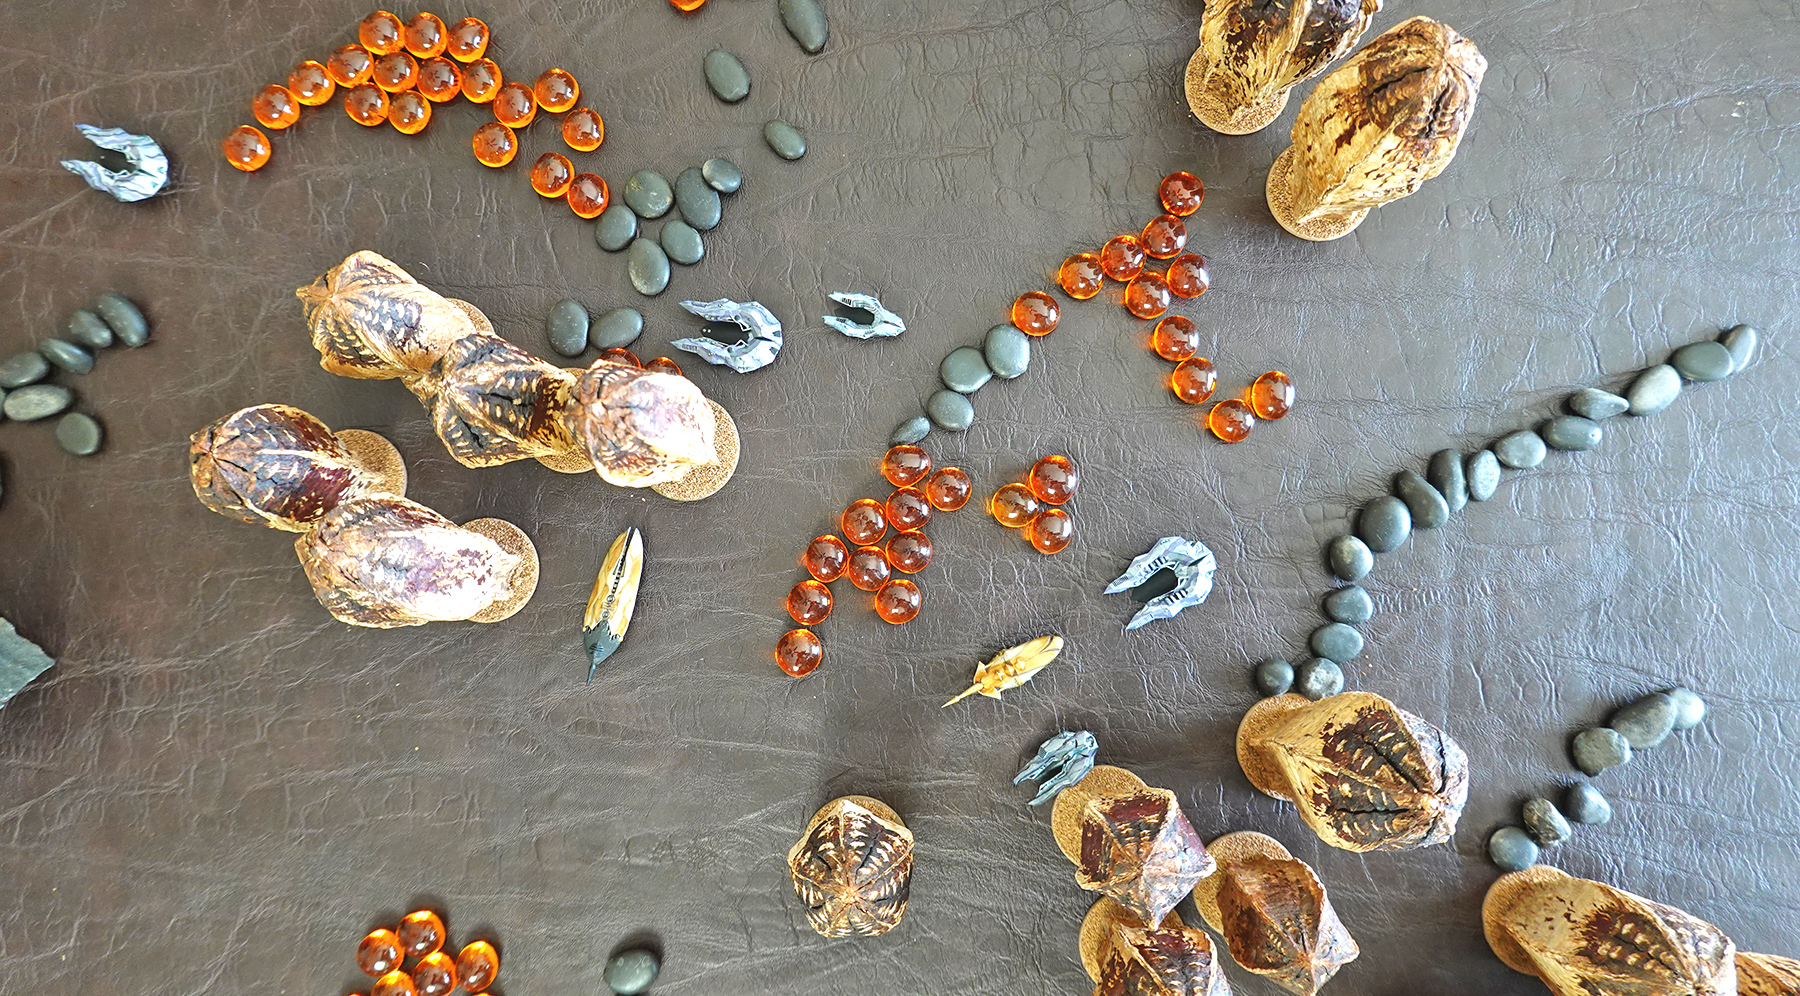
Above: Good view of the Thresher position, with the
threshers visible in the middle, both of them with white marker beacons placed
on their respective positions. The Selangor Mako is blurry in the foreground
and the Australian Tegu that launched the marker beacons is in the background
behind the two threshers. |
| |

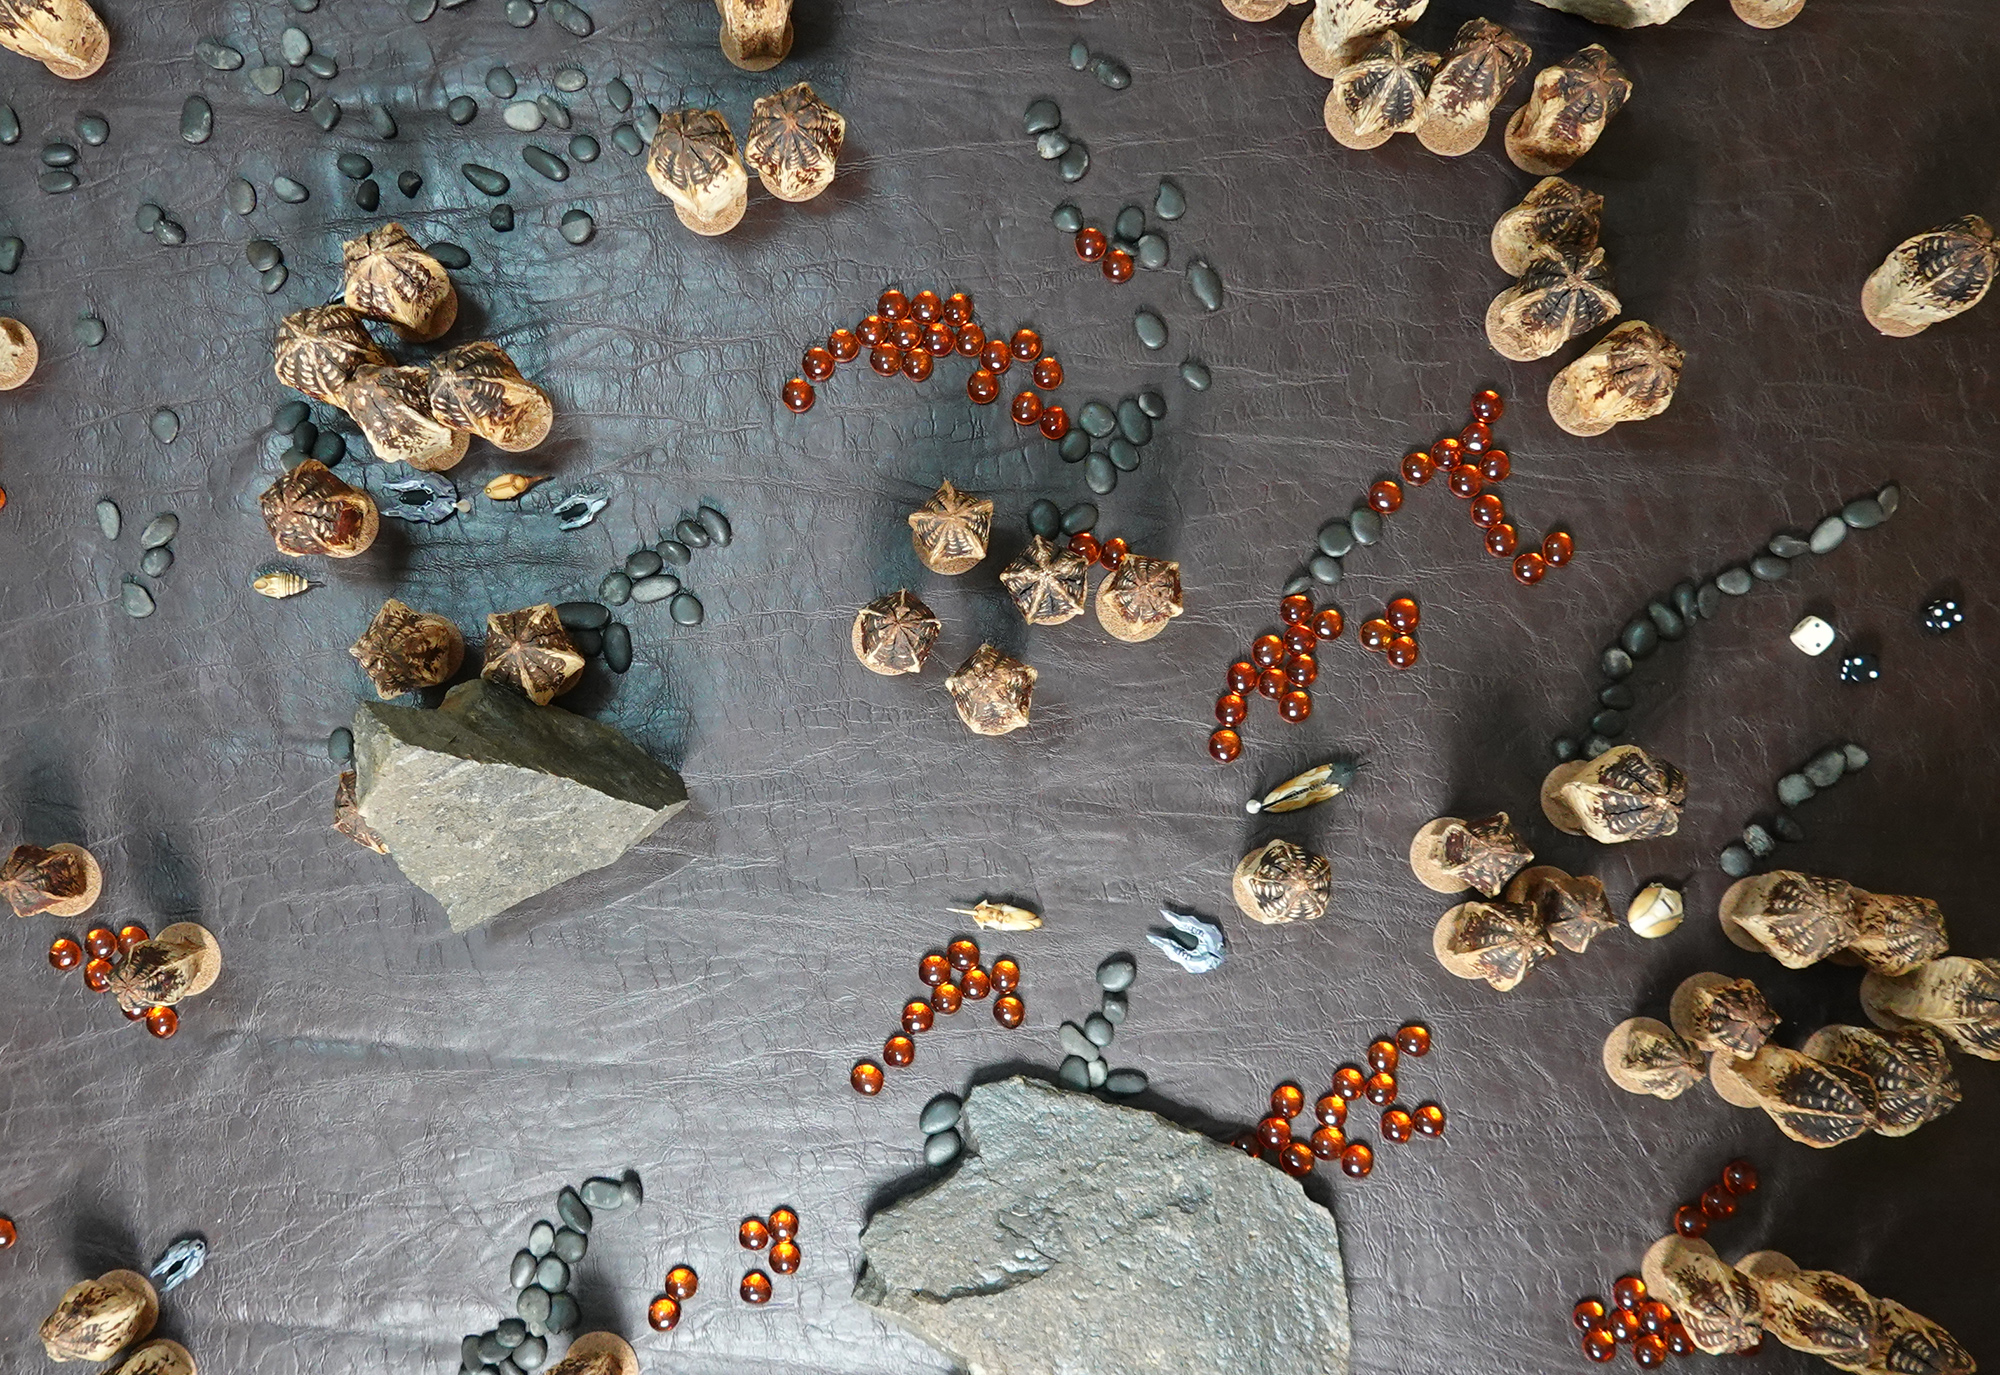
Above: Overhead view after Turn 3 moves by both sides.
The battle is splitting into two clusters; in the foreground the Komodo has
turned to fire into the Tiger's rear and the Tokay has come out of hiding in an
attempt to get its jammer unit to bear on a lucrative Selangor target. The Gila
has backed away from the Tiger into cover. In the background, the Australian
Skink has closed on Thresher 2 and is steadily plinking at it with decent
effect. The Mako is off-screen to upper left |
| |
| Turn three was opened by both Selangor and the
Australians effecting moves which split the field into two clusters of MGVs -
with lots of crossfire! Winner of the third "Y" phase initiative roll was
suddenly crucial to the game, and the winner was... the Selangor. Mako opened
fire on Komodo from the rear and scored a damaging hull cell destruction hit
aft. The Threshers (now separated but still engaging in unison) fired more
missiles on Tokay and scored one core and three hull infestations in an
excellently planned die roll |
| |
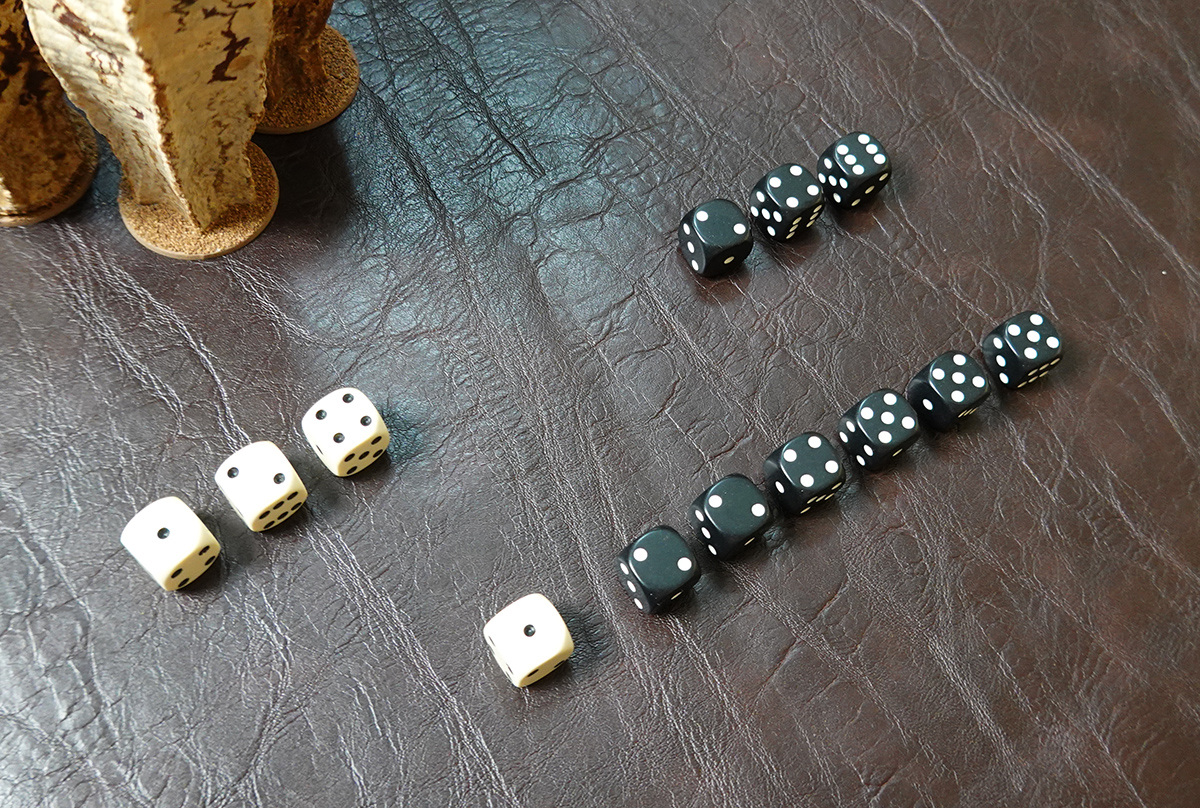
Above: How the Thresher scored a core and
three hull infestations; mixed attack. It put three dice into core attack
(black dice) and three into hull attack (white dice). The prediction
(correctly) was that the defender would weight the defense in favor of
protecting the core, which they did with six black (core) dice and only one
white (hull) die. |
| |
Last fire of the turn was by the Australians,
which put more damage on the Tiger and Thresher units via combined fire of the
Komodo, Skink and Gila. Ironically, the Thresher managed to completely block
the Gila's missile fire, it was the nearby Skink's potshotting that put a
sensor and defense hit on the pinned Thresher 2. The Tegu was now out of
beacons and became functionally useless as a combat unit, partly due to an
early payload hit by the Skink's photon weapon. The Skink punched way above its
weight at least through turn three.
During the reset phase, Komodo and
Tokay both experienced brain (B) hits as a result of their ongoing core
infestations. Some of Komodo's many hull infestations also spread, but in an
amazing example of damage control, it managed to scrub all three core
infestations with five damage control dice! Pretty amazing. |
| |
Above: Game state at end of third turn combat; both
sides are well mixed, with the Selangor Tiger punching into Australian lines
and light Australian units harassing and spotting the main Selangor missile
units. The Australian Tokay is moving forward in search of things to jam, but
has been beacon marked by the distant Mako (far lower left), which has managed
to stay mostly out of harm's way. Both Komodo and Tokay are operating with
brain (B) hits (Komodo's soon to be repaired). |
| |
Turn four started with the Australian side
rolling an enviable win on the "W" Phase initiative roll. They moved, bringing
the Tokay further forward and turning to bear its jamming module on as wide of
an area as possible. The Gila moved to the right for cover, preferably away
from the Tiger pointing dangerously in its direction (Gila has a good defense,
but its job for this game was to launch missiles from a standoff position). The
Komodo moved right onto the Tiger's "stern" for a hopeful point blank shot, and
invoked the optional pursuit rule, marking the small gap between the two bases
with a red spike (the optional Pursuit rule allows a base with unused movement
that ends its turn in a chase position to the immediate rear of an enemy MGV to
use the balance of its unused movement on the enemy move phase if the enemy MGV
tries to move away on the same bearing).
For the "X" phase, Selangor won
initiative and also used it to move. In a surprise action, the Tiger did an
about-face and closed on its pursuers, moving to point blank range on the
Tokay's right side. Other units moved forward in general support. This was
followed by a phase of Australian fire, with the Gila spraying the still
visible Thresher 2 with another missile barrage to further infest the hull with
nano-assault compounds and the Tokay flipped on its jamming unit again,
instantly paralyzing the Tiger (again) and at such close range this caused a
brain (B) hit on the Tiger. Selangor counter-fire was effective, the Tiger was
still able to fire its kinetic main weapon at point blank range and fortunately
for it, the Tokay was "filling the screen" in a can't miss view; score was as
deadly four point deep strike that punched into Tokay's core. The Mako took a
thermal shot at the Tokay and seared a large hole in its rear side, and the
joint Thresher group - finally tiring of the Australian Skink running around
the rear lines spotting and effectively potshotting at them - put all their
fire onto the one little MGV, smothering it with four core nano-infestations as
well as several hull hits.
The reset phase saw the game's first die roll
checks for sudden death due to B hits, none occurred. All MGVs with
infestations suffered steady spreading in return for only modest repair
results. The nanobots were cumulatively gaining ground. |
| |

Above: End of fourth turn combat; The Komodo, Tiger
and Tokay in a tight combat knot with Mako firing from the background (left).
In the blurry distance are the Skink and Sharpnose continuing to duel with each
other, the Skink having just been pasted down with multiple missile delivered
nano-infestations. |
| |
| The fifth turn ended up being the last. The
Selangor won the initiative roll, giving them an enviable two consecutive fire
phases. Tiger - no longer paralyzed - on Tokay again, slamming it with a five
point deep kinetic hit at point blank range that penetrated all the way through
the Tokay core. The Mako was tempted to fire on Tokay also, but its thermal
weapon risked damage to the "friendly" nanocompounds infesting the Tokay's
outer hull... didn't want that. So it instead fired on Komodo, putting another
large hole in its stern (or rear end, or whatever they call the back). In one
of those "Feeling lucky today" moments, the two Threshers tried the all-core
missile attack again and scored big against the Komodo; overwhelming the
Australian defense dice roll they inflicted seven core infestations. |
| |

The "Feeling lucky" missile attack roll;
bottom is the Komodo's sensible mixed defense roll, and at top is the Thresher
1 attack roll going for all-core assault, showing its four-sixes payoff that
scored six core infestation hits. |
| |
Wrapping up their firing session, the Selangor
side won the initiative roll and in another unexpected move, their units
executed a general charge. All moved forward from their existing positions and
passed across the field at the highest speeds possible - generally toward the
Australian rear but also in the direction of the Gila unit still running along
the far side of a line of rocky debris. The Australian countermove was to
pursue as much as possible, or to recall its smaller units and regroup in the
left rear.
Final firing was surprisingly effective; Komodo gave a good
hard kinetic hit into the rear of the Tiger unit, and the Tokay used its light
photon main to score an amazing three hits on the Tiger by rolling all fives
and sixes on the dice.
The reset phase saw two deaths: Skink and Tokay
both locked up and stopped running ("died") due to the many on-board
nanoattacks into their AI brain units. The several other units from both sides
survived, but Komodo suffered more spreading from a cumulative nano-infestation
that was wildly out of control; 10 core hits and six hull hits, it was nearly
impossible for it to survive the end of turn six and its many speed hits meant
it could no longer pursue the Selangor charging into Australian lines. The
Australian player called the game with three (effectively) down from battle and
one badly damaged. One of the Selangor Threshers was also unlikely to survive,
but that left four units (albeit a now damaged Tiger MGV). |
| |
The last moves: Selangor units rush forward to push
through the Australian center. The Australians attempt pursuit with units on
the verge of brain termination. At far left is Thresher 1 following Thresher 2
across the field. The Australian Gila has moved off the lower right side of the
screen to double back as part of the recall.
|
